Overview
Lookbook’s preview embeds allow live component previews to be embedded in Lookbook pages, on external sites or in the parent app’s templates.
Each embed is an iframe that points to a customised version of the preview inspector, running on your server.
The embed can be customised to hide/show inspector panels, allow switching between scenarios, and more.
Example embed
The following is an example of a full-featured embed of a preview from the Lookbook demo site:
Embed code
<lookbook-embed
  app="https://demo.lookbook.build/lookbook"
  preview="Feedback::BlankSlateComponentPreview"
  scenario="default"
  panels="params,source,output"
  actions="inspect,open"
  param-icon="true">
</lookbook-embed>
Initial setup
There are a few steps that will need to be undertaken before preview embeds can be used.
This section outlines the setup process for embedding previews in pages outside of Lookbook. For using within Lookbook, see the docs on rendering previews in pages or skip straight to the configuring embeds section.
1 Enable Lookbook in production
Lookbook must be running in production (and publically accessible) if embeds are to work, as they must be configured to point to a running Lookbook instance.
See the docs on running to production for more details.
2 Configure the access policy
By default, Lookbook will block access to the embed from any external domains.
Set the preview_embeds.policy to ALLOWALL to allow access if you are embedding previews externally:
# config/application.rb
config.lookbook.preview_embeds.policy = "ALLOWALL"
If you are hosting embeds on the same domain as the Lookbook instance you do not need to change this value.
3 Include the Lookbook JS
Every page that has an embed on it will need to include the Lookbook JS file.
This is served by every app running Lookbook at /lookbook-assets/js/lookbook.js and can either be referenced from there directly
or pulled down and included separately.
The Lookbook JS file includes the popular iFrame Resizer script. If your app already includes this in its JS bundle then you should use a lighter-weight ‘core’ version of the Lookbook JS that does not have the iframe resizer script bundled together with it.
This script is served by apps running Lookbook at /lookbook-assets/js/lookbook-core.js.
The lookbook.js script will initialize all embeds on page load, but any embeds
added to the page after this will need to be manually initialized. Read more →
Once everything is setup, embeds can be added via the <lookbook-embed> element, with config options
for each instance are set via attributes on the tag.
Getting an embed code
The quickest way to get an embed code is to open the relevant preview in Lookbook and click on the ‘embed’ icon in the top right toolbar.
This will open a panel where you can see the embed code for the current preview. Just copy and paste the code from here into the desired page and the preview embed will be displayed.
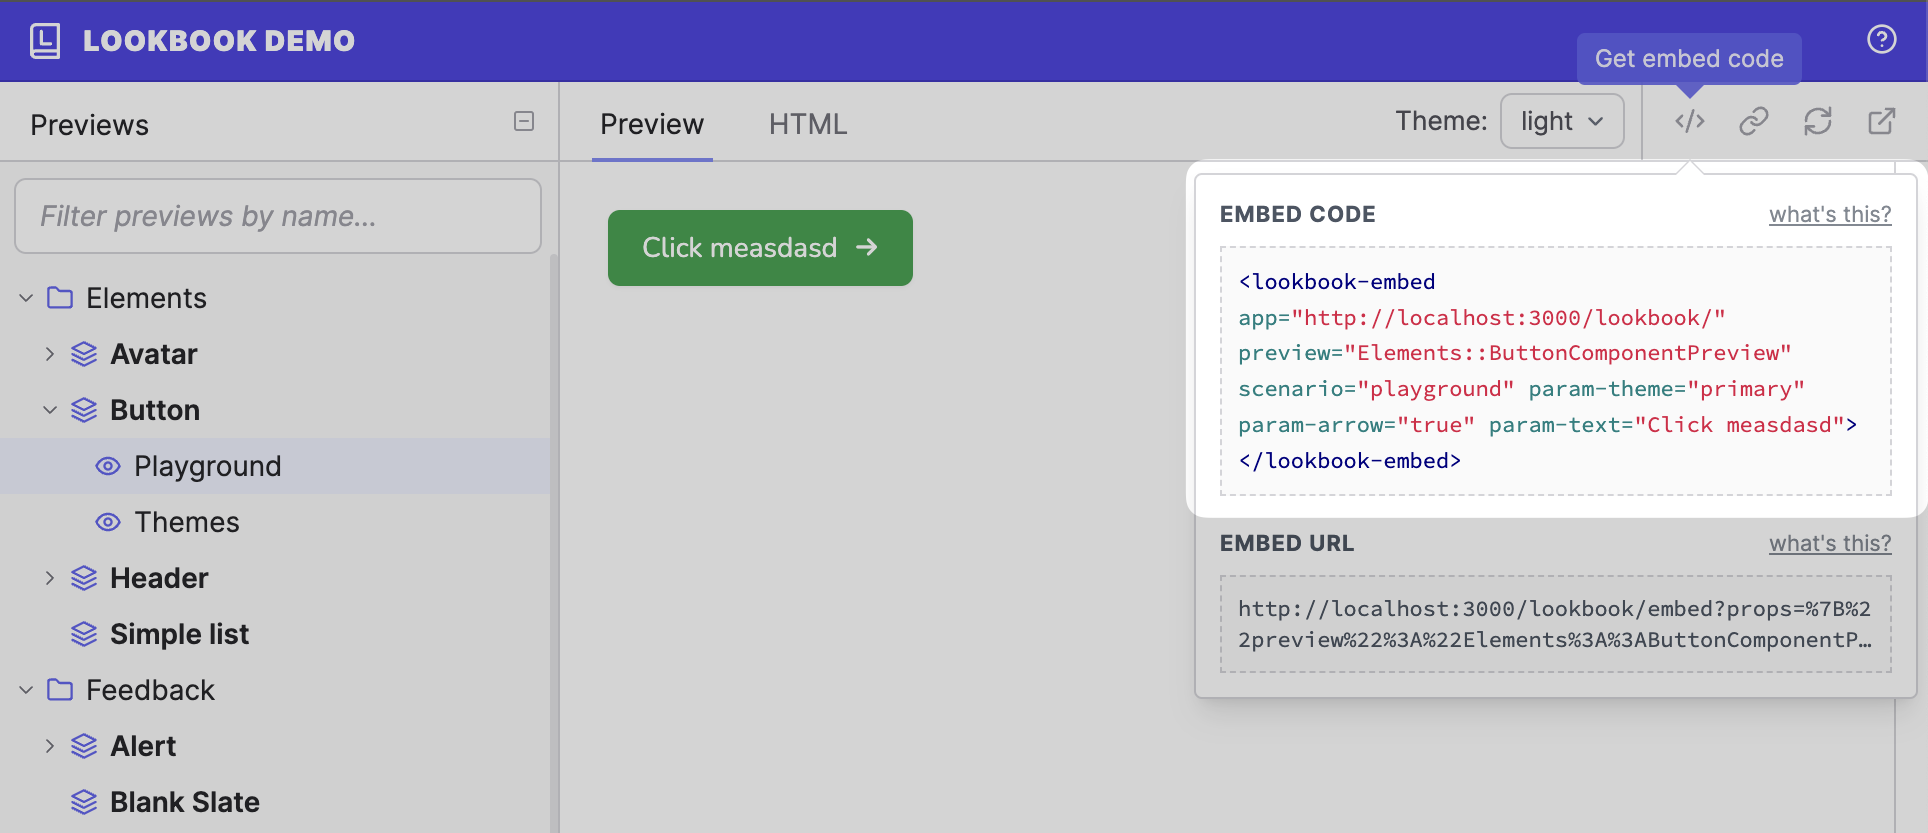
The embed code will automatically reflect any @param values that have been set - so the resulting embed will default to these values.
Configuring embeds
Embeds created with the <lookbook-embed> tag can be configured using HTML attributes set on the element itself.
Basic embed
The app and preview attributes are the only two that are required for a basic embed:
<lookbook-embed
  app="https://demo.lookbook.build/lookbook"
  preview="Feedback::AlertComponentPreview">
</lookbook-embed>
Generated embed
app: The root URL of the parent Lookbook instancepreview: The full class name of the target preview class.
If the embed is on the same domain as the Lookbook instance and Lookbook is mounted at the standard path (/lookbook)
then the app attribute can be omitted, otherwise it is required.
Scenarios
By default the preview will render the first scenario defined in the preview class.
To specify a particular scenario, add the scenario attribute with the target scenario (method) name:
<lookbook-embed scenario="danger" ...>
Generated embed
Providing a comma-separated list of scenario names will add a ‘scenario switcher’ to the embed to allow users to navigate between scenarios:
<lookbook-embed scenario="success,danger" ...>
Generated embed
To include all scenarios in the switcher, set the scenario attribute value to *:
Panels
By default, none of the preview inspector panels are displayed in the embed.
To show one or more panels, provide a comma-separated list of panel names as the panels attribute value:
<lookbook-embed panels="source,params" ...>
Generated embed
Note that the wildcard character * can be used to represent ‘all other panels’.
panels="*" <!-- show all panels, including any custom ones -->
panels="notes,source,*" <!-- show notes, then source, then all other panels -->
Available panels:
source
|
The source code for the current preview |
notes
|
Notes on the current preview |
params
|
Displays the dynamic param editor fields |
output
|
The rendered HTML output from the component |
Actions
‘Action’ buttons are displayed in the right-hand side of the embed header and are specified via the actions attribute as a
comma-separated list of names:
<lookbook-embed actions="open" ...>
Generated embed
Available actions:
inspect
|
Link to the appropriate preview in the parent Lookbook instance |
open
|
Link to open the current preview in a standalone new window |
Params
If the preview has been set up to make use of preview parameters (with or without param fields) then parameter values can be passed to the embed.
To set an intial value for a preview parameter, use an attribute in the format param-<param-name>="<param-value>".
<lookbook-embed param-text="Some custom button text" ...>
Generated embed
Default values
You can specify default values for the panels and actions options when configuring Lookbook:
# config/application.rb
config.lookbook.preview_embeds.panels = ["notes", "source"]
config.lookbook.preview_embeds.actions = ["inspect"]
Once set, only embeds that wish to override the defaults need specify these as attributes.
Manually initializing embeds
The lookbook.js script will automatically initialize all embeds on page load.
However, if embeds are dynamically added to the page after the initial page load then they will need to be
manually initialized using the Lookbook.initEmbeds function:
document.addEventListener("some-load-event", () => {
  window.Lookbook.initEmbeds();
});
Using in third party services
Third-party services such as Notion will not let you include your own JavaScript,
so it’s not possible to use <lookbook-embed> elements to embed previews in these apps.
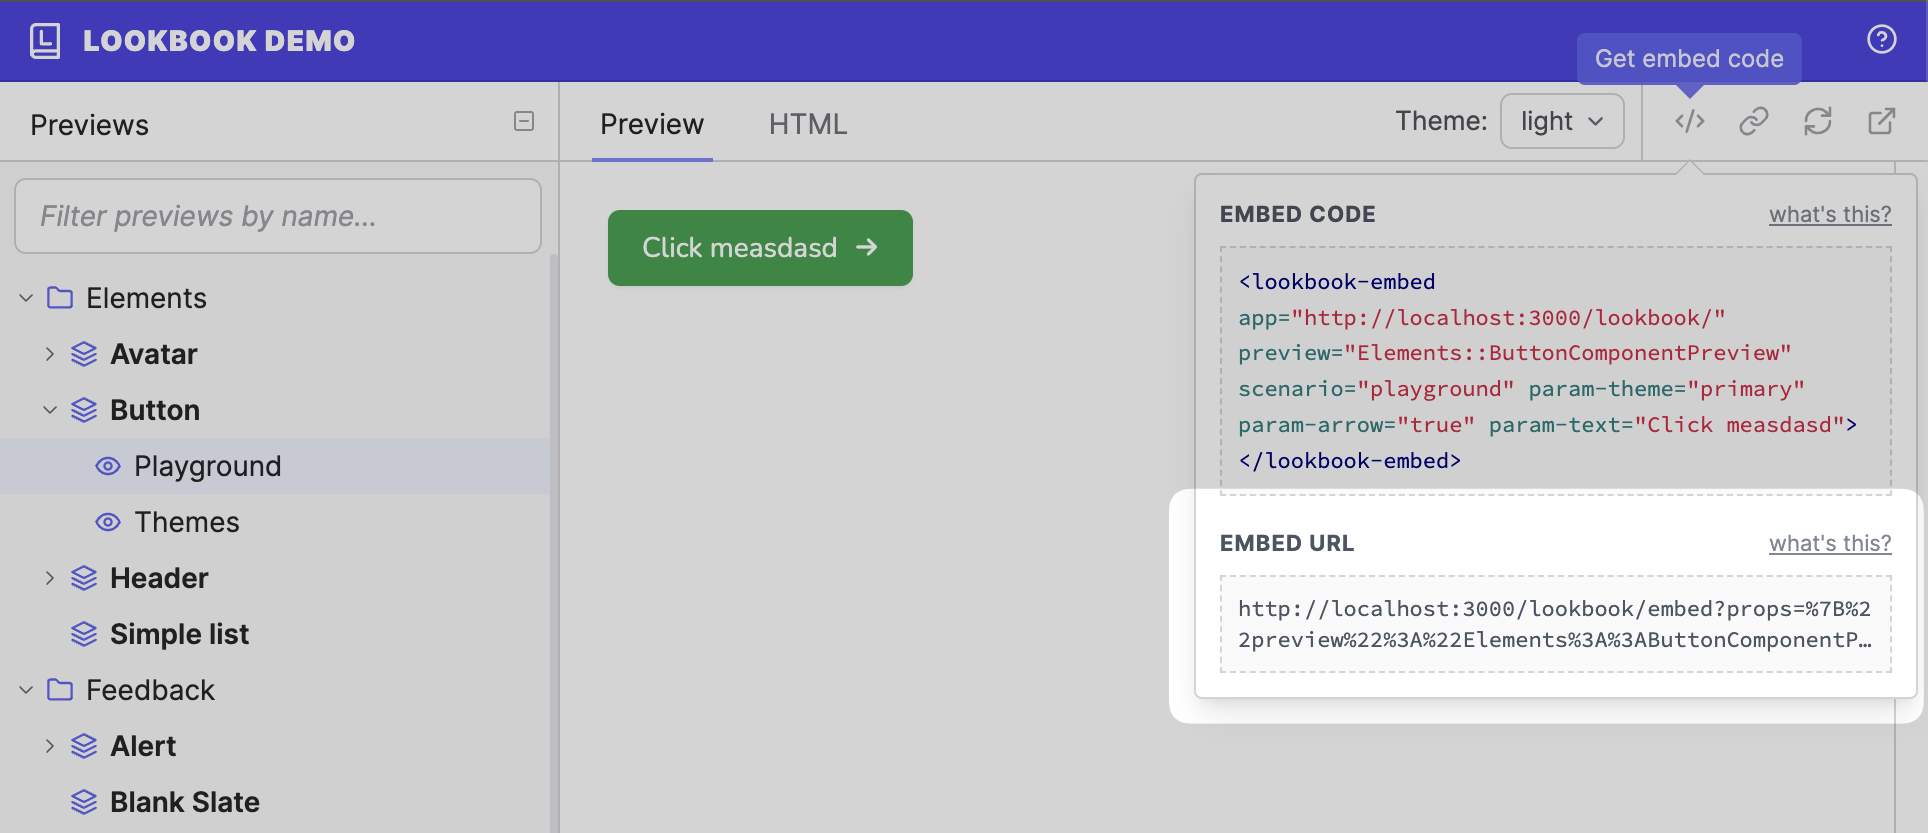
However, if the service supports embedding external content via an iframe then you can add one using the
the preview embed URL which is available in the embed dropdown for each preview in Lookbook:
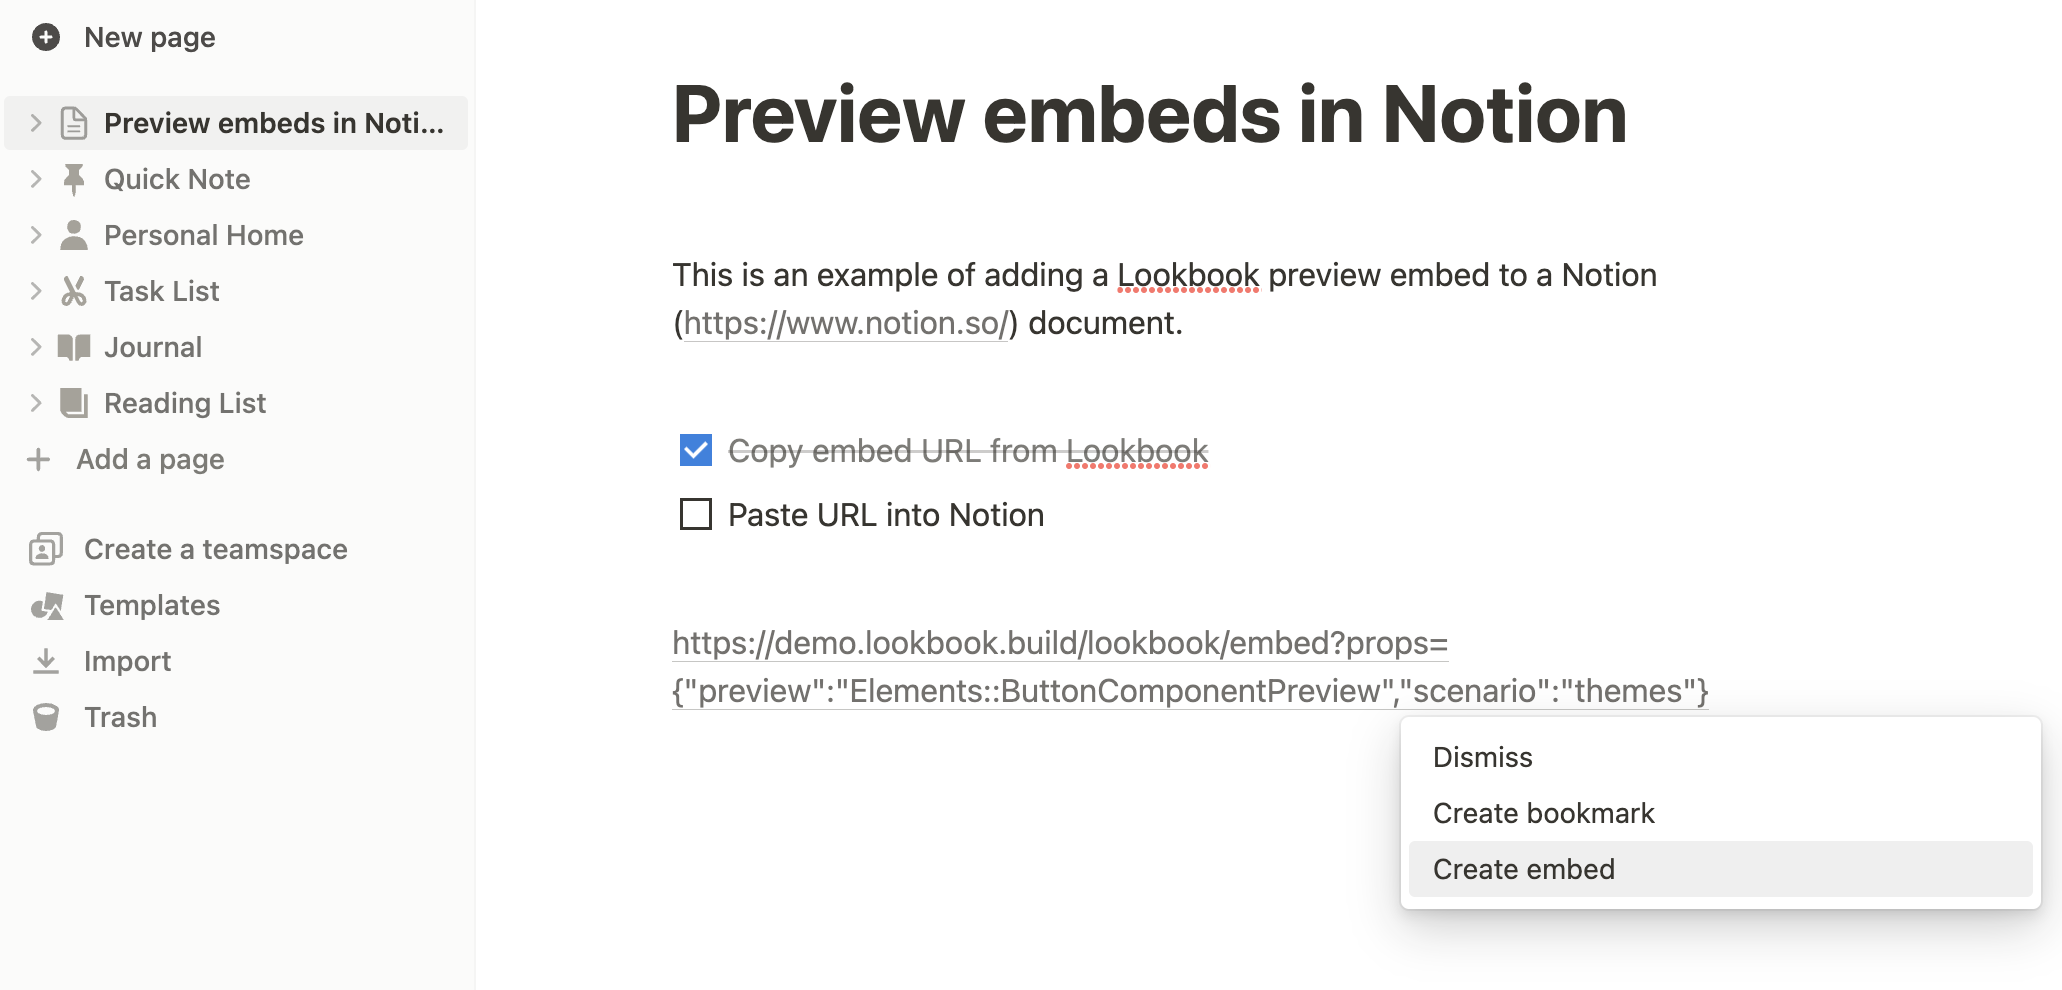
Unfortunately, without the corresponding JavaScript in the host page, the iframe will not automatically adjust its height as content in the iframe changes.
In apps such as Notion it is possible to manually resize the iframe so this is not such a problem, but each service will handle this differently.
Disabling embeds
If you do not want to support embeds at all (including in Lookbook pages), you can disable them completely.
# config/application.rb
config.lookbook.preview_embeds.enabled = false